
Published by Andy from The Travel Hub
Andy is one of the Co-Founders of The Travel Hub and describes African wildlife safaris as his "ultimate travel experience". Combining his passions of travel and photography with a love of animals and nature. It has also been a major source of inspiration to improve his photography.
Instagram: @andrewmarty_
I often get asked – “what is your favourite place you have travelled to”. The answer for me, lies in the fact I keep going back to experience wildlife safaris in South Africa. You cannot replicate the feeling of seeing those incredible creatures in their own environment. A wildlife safari is to a zoo, what SCUBA diving is to a fish tank……that is the best way I can describe it!
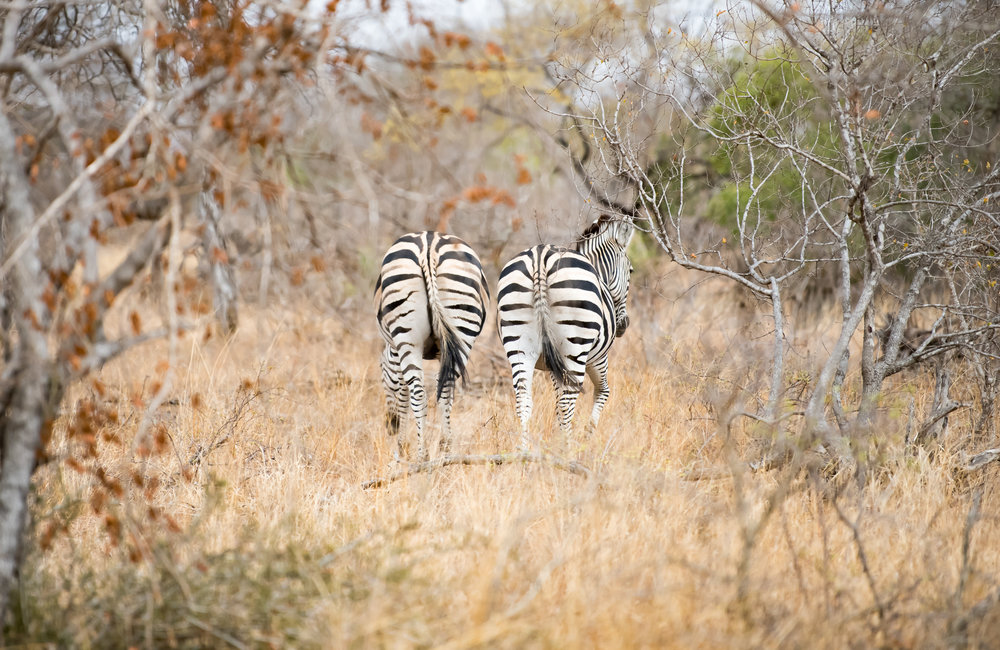
Wildlife viewing is something that has inspired me to become better at photography and this year I made the decision to significantly upgrade my camera equipment and push myself to really improve my photography skills. I booked a stay at Kambaku Safari Lodge in Timbavarti – part of South Africa’s iconic Greater Kruger National Park. This lodge was the perfect location with excellent game viewing and the staff, including owner Bryce Landsman and manager Ryno Vosloo, both having keen interest in wildlife photography. We also arranged to spend a day with professional wildlife photographer Villiers Steyn from At Close Quarters and this would prove to be one of the most rewarding experiences I have had from a photography perspective.
I wanted to put together an easy to understand guide for anyone that is thinking of travelling to South Africa and go on safari. I hope you find it useful. These tips are purely my own thoughts, very much from the perspective of an amateur photographer. I wanted to share some of the things I have learned which have improved my wildlife photography.
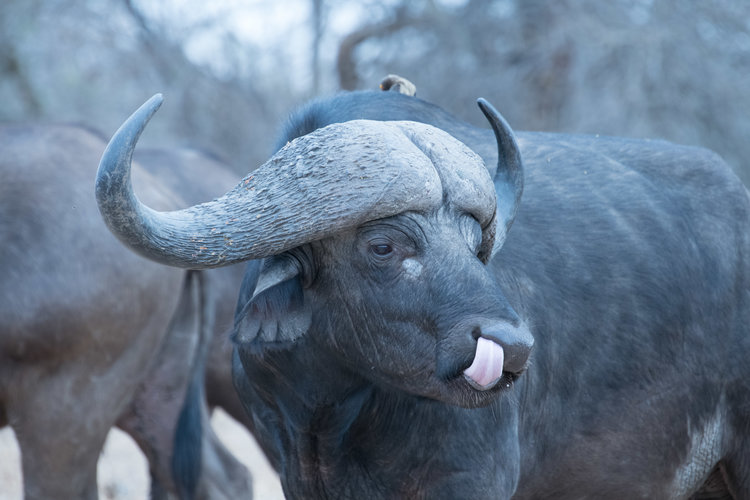
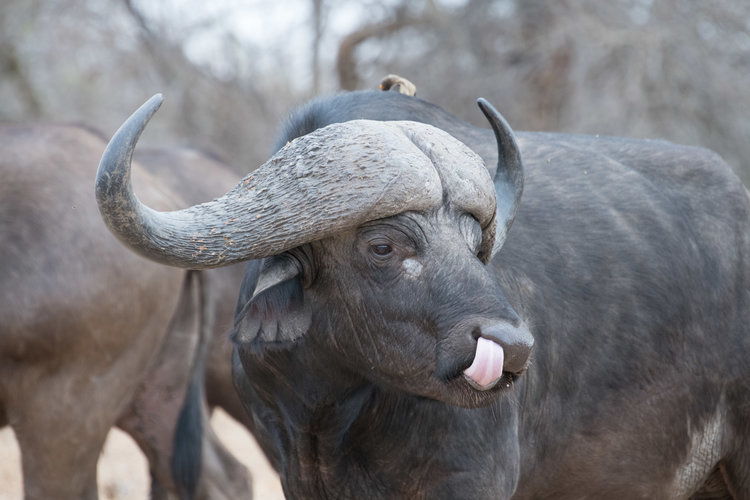
The first image is from my first wildlife safari 5 years ago and the second one is from a recent visit to Kambaku Safari Lodge, Timbavarti.
1. Booking your trip:
You can have the best equipment in the world or be an amazing photographer, but if you aren’t where the animals are, you’re not going to get good photos. Wildlife safaris are not like walking around the zoo! Animals have different distributions, times of year when they are easier to locate and lodges have access to varying concessions of land. If you are going on safari for the first time, make sure you at least put yourself in the best position to see animals!
The best time of year for a wildlife safari in my opinion is during the dry season or the Winter months (May to September). Whilst some people enjoy seeing everything lush and green as it will be during the summer, the wildlife are harder to spot during this time due to the thick vegetation. During the drier months, not only are the animals easier to view, they can also be easier to locate as places to find water become less common.
Understand that certain parks and lodges have access to different populations of animals. So if you are determined to see a specific animal, find out what areas are best for viewing that species. I was wanting to photograph leopards, which is why I looked at lodges in Timbavarti and Sabi Sands - they are renowned for having good leopard populations. Previously I have visited Phinda on the east coast of South Africa because their cheetah and black rhino conservation/populations are industry leading.
Most first time visitors will want to see the “Big 5” – lion, leopard, elephant, rhinoceros and cape buffalo. Many lodges will advertise Big 5 viewing, but the frequency of guests seeing all of them is quite low. If Big 5 is your wish, choose somewhere that has leopard populations, because these tend to be the most difficult!
Another reason I chose Kambaku Lodges is that they own the land, so they have access to areas that other vehicles cant go. The ability for your driver to venture off road and get you closer to the animals is a huge advantage when you are taking photos. Kambaku also has access to a huge area within Timbavarti, so the range that you can travel to locate animals is enormous. Some smaller reserves simply don’t have the space to maintain populations that normally migrate over huge distances.
If you are going on a safari for the first time or really want to focus on your photography, I would insist on staying at a lodge that provides morning and evening game drives as part of the package. The option of driving yourself sounds appealing, but you are going to miss 95% of the animals you would’ve seen if you paid the extra to be on private game drives. The rangers have a great idea of where the animals are likely to be, the spotters eyes will leave you speechless and they are able to get you in the best position possible to take photos! The vehicles are really well set up for photography and you learn so much from talking to the experienced rangers. I also really love the opportunity to meet other travelers from all over the world!
Finally, the accommodation itself is important. I was travelling alone, so I am happy with good food and a comfy bed. But I have gone of safaris with friends, my wife, young children, parents – so at times the facilities become a major consideration. There is a huge range in standards from cheap, self-catered lodges through to high end luxury. Most lodges will include meals and 2 game drives per day in their rates. As a genral rules, the accommodation & services at respected lodges is incredible – they are truly luxury in the bush. You can pay extraordinary amounts to stay at some of the top end lodges (up to R70,000.00 per night!), however the wildlife viewing will be almost identical to a comparable lodge in the same area. Kambaku Lodges have 2 sites – River Sands being a 5 star property aimed more towards luxury travellers, and Safari Lodge, a more affordable but still extremely comfortable lodge! From all my experience on going to South Africa for safaris, Kambaku Safari Lodge was by far the best value for money experience I have had. It is somewhere I would certainly plan to go back for wildlife photography.
Once you have decided on a lodge, book any internal flights as far in advance as you can. There are domestic airports in places such as Hoedspruit and Nelspruit that take flights from Cape Town and Johannesburg, however the airfares can become exhorbedant within months of travel. Alternatively, if you are happy to drive from Johannesburg or you have chosen a lodge that is closer to an international airport, hiring a car and driving may be a significantly cheaper option (prices for flights can be as much as USD1,200.00 each way). When I visited Phinda, it was a safe 2.5 hour drive North of King Shaka International Airport in Durban.
A small note for when you use the domestic flights - the small planes have very limited carry-on baggage space, so it is common for them to take your backpack and stow it! I always try to board first to ensure I can keep my camera and lenses with me. Make absolutely sure that you pack your gear really carefully, lock your camera bag and be prepared for it to be stowed rather than with you on the flight!
2. Equipment:
There is an enormous variety of equipment that you can find yourself faced with when considering a photographic safari. Not all of it is necessary, but having an idea of the sort of things you can take with your might help to decide what you do and don't need.
Camera body: There is range of cameras used on wildlife safaris - from smartphones through to top end digital SLRs. Admittedly I do take photos on my iPhone - its so quick and easy (especially for Instagram stories or sending messages to family/friends). In ideal conditions (good lighting and animals are close), phones these days can take remarkably good pictures. That said, if you are serious about taking wildlife photos, you are probably going to be looking at a digital SLR (DSLR) or good quality mirrorless body, because they offer a greater scope to adjust settings in different conditions. Some of the compact cameras are quite useful and I do take a small Samsung with me on safari as a back up. I think if you are splashing out for a safari and you are reading this article, you are going to be looking at taking a DSLR/mirrorless body of some sort with you.
When we are talking wildlife photography, the resolution of the camera is important, as always, but the speed of the camera also becomes a critical factor because our subjects are often on the move. Traditionally, higher resolution means a slower frame rate and vice versa, so wildlife photography cameras tend to sacrifice the number of megapixels to maintain a higher speed.
If you own a digital camera, check what the frame rate and resolution of your camera are. Next make sure your camera has the ability to change shutter speed, ISO and aperture – we will get to these in a little bit.
On this trip I was fortunate enough to have the new Nikon D850 which had just been released. The exciting thing about this camera for wildlife photography is the high resolution (45.7 megapixels), whilst maintaining a high frame rate (7 frames per second, which can be increased to 9 with a battery grip). It also performs extremely well in low light conditions, making it a really incredible wildlife photography body.
If you don’t think you have the equipment, it might be an idea to look at renting. There are companies such as OutdoorPhoto that will loan you camera bodies and lenses. This is a really great option if you want to see whether you really enjoy wildlife photography - hopefully you do! Check their website as it also has some amazing specials and great photography reviews and information. Make sure you spend time getting comfortable with the new gear before your first drive.
Lenses: A major factor for wildlife photography is the proximity you will be from your subject – so having a zoom lens will become important! It can sometimes be quite frustrating if the animals are too far away and you don't have the zoom to get nice pictures.
I do carry an “all-purpose” Nikkor 24-70mm lens for landscape and wider angle shots, this does come in handy when there are a number of animals close to the vehicle. For my zoom lens I have a 70-200mm f2.8 Nikkor lens and for the most part this was quite adequate, especially with a camera that pushes out almost 46megapixels where I can crop in later. Ideally it would be nice to have a little bit more zoom and some brands do have variable lenses out to 300 and 400mm. The next lens on my wishlist for wildlife (or the one I would probably look at renting for my next safari) would be a 500mm f4. To fill the gap and a cheaper option was to use a 2 times teleconverter on the 200mm lens – this essentially increases the zoom to 400mm, but there is a sacrifice, that we will get to later. For this trip, I found I was quite comfortable using to 70-200mm lens as we had such great access to animals.
Tripod: There is limited use for a tripod on a safari – in the vehicle, they aren’t useful at all. If you are keen to take some nice sunset pics around waterholes or even night-time astro photography then I guess you could pack your tripod.
Monopod: Some people like to use these as a stabilizer in the safari vehicle and I do this sometimes in low-light/nightime when using a slower shutter speed. Otherwise, I find it limits your flexability and tends to get in the way more than it helps.
Bean bag: To stabilize your camera , and especially to take the weight of larger lenses, a large bean bag (I use a large flight fillow) wrapped over the rail in the vehicle works really well.
Gorilla grips: These flexible devices work really well for stabilizing GoPros or smartphones in the car for video – place them in the car, set a timelapse and it creates a really neat video! I have one large enough to carry the weight of my DSLR and lens so it removed the need to carry a tripod a lot of the time.
Cleaning: I always carry single use sachets of glass cleaner as you will often get dust across your lens. I also have a dusting kit to blow away the sand and dust at the end of each day.
Filters: As standard, I have UV filters on each of my lenses. They protect the lenses from being scratched as well as filtering UV light.
Memory cards: Always make sure you are carrying a minimum of 3 memory cards as you will be firing through a lot of images and RAW files can take up a huge amount of space. I carry 2 32GB and a 64GB XQD cards and also keep a 64GB SD card in the camera for overflow and spare.
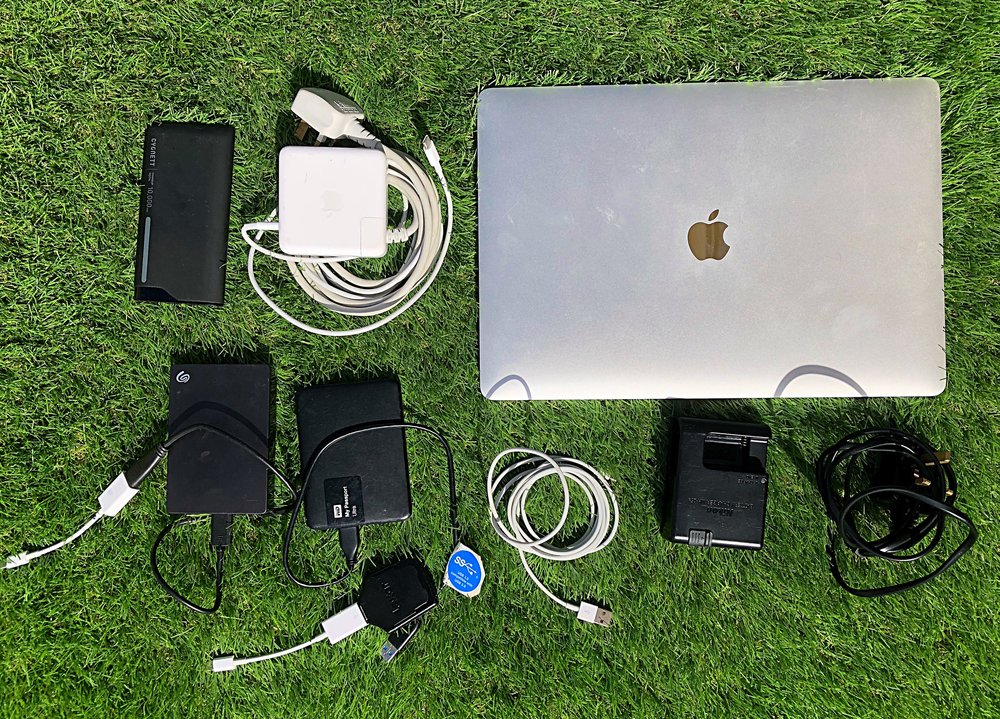
Laptop: I always download and backup files each night following game drives, allowing me to format the memory cards.
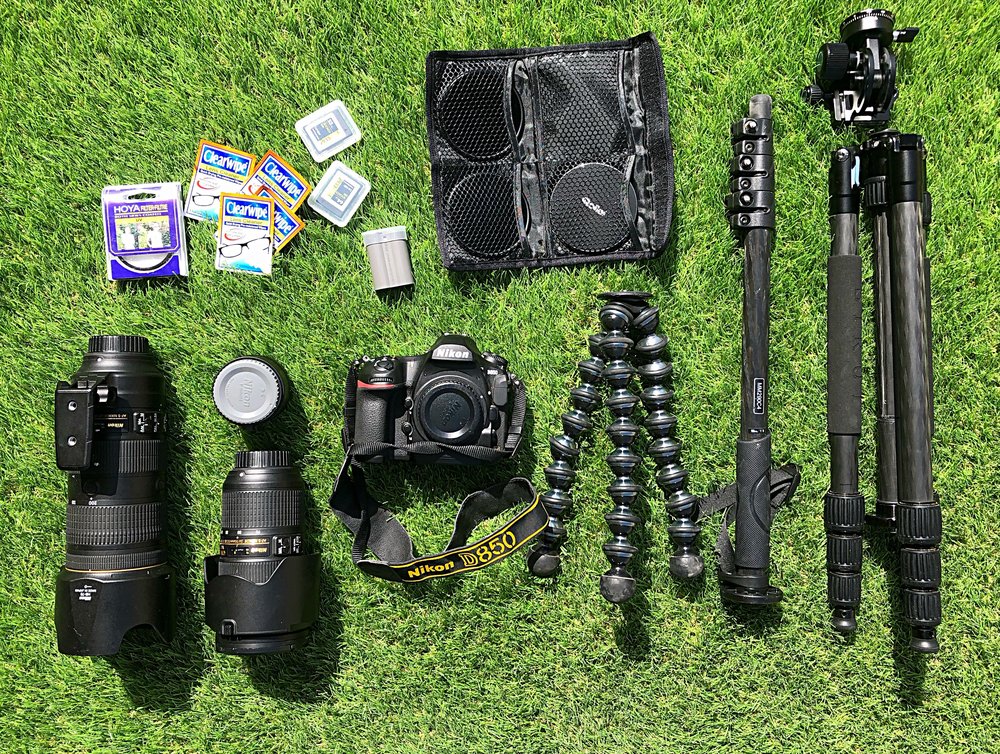
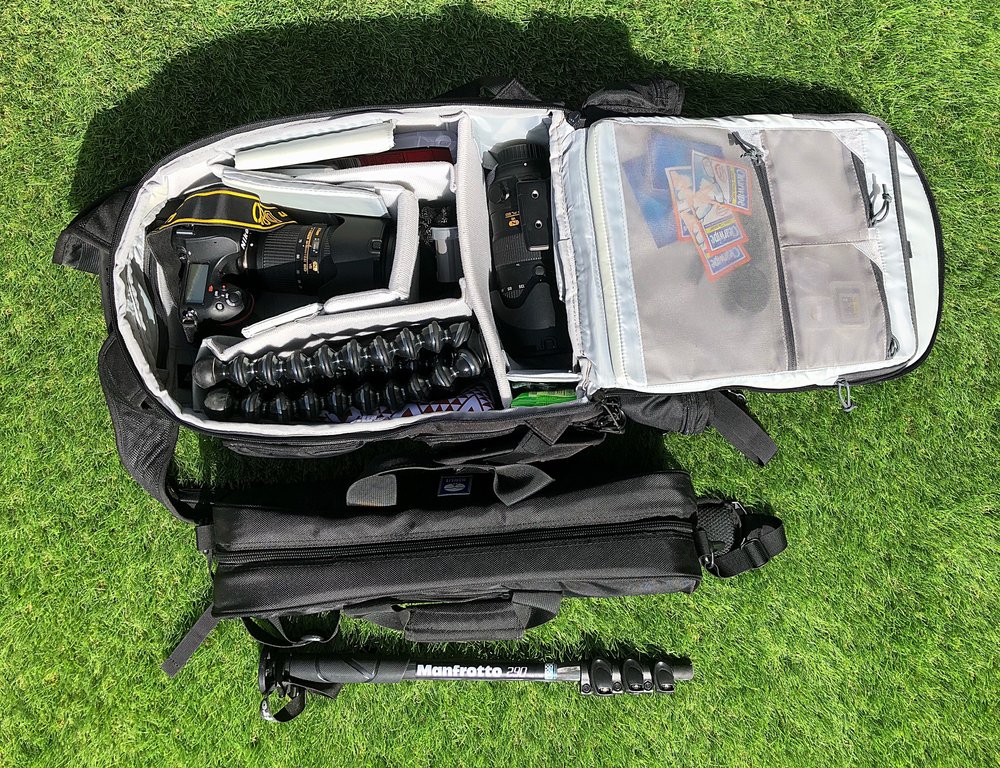
My camera bag:
Nikon D850
Nikkor 24-70mm f2.8
Nikkor 70-200mm f2.8
Nikon 2x teleconverter
Hoya UV filters
Rollei ND filters (6, 8, 10 stop)
Sirui tripod
Manfrotto monopod
Gorilla grip
Spare camera battery
3 memory cards (2x32Gb and 1x64Gb)
Lens cleaners
Travel Pillow
3. Safari Game Drives:
The main reason you have booked to stay at a safari lodge should be to go on game drives. Whilst there is some variation between lodges, the general itinerary is much the same:
- Up very early (pre-dawn) for a quick snack and coffee.
- Morning game drive (usually 6am to 9am) including morning tea.
- Back for late breakfast/early lunch.
- Spare time in the middle of the day.
- Evening game drive (usually 4pm to 7pm) including "sundowners".
- Dinner
Some lodges will offer the opportunity to do things like a walking safari in the middle of the day. These can be a great opportunity to get out, stretch the legs and see some animals from a different perspective. For the sake of this photography review, we will focus mainly on the game drives.
Typically you will be in a game vehicle with a number of other guests. Some lodges will have 3 people to a row but I would be reluctant to stay somewhere that routinely crams people in this much. If you get the chance, try to sit in the row behind the driver – a lower perspective is preferred for photos as you are closer to being on the same vertical plane. There will naturally be some luck in terms of where animals will be relative to your spot in the vehicle, but closer to the front is also a more comfortable ride.
Typically I will take my camera bag in the car with my camera gear and a few snacks (do yourself a favour and grab a few packs of biltong from Woolworths at Joburg airport before you fly to safari!). There isn't a great deal of space so consider that when planning what to take. It can also get quite warm during the day, but cold at night, so dress with layers and take a coat and beanie if you are visiting in the cooler months – you will need it!
The drives themselves will always try to cater for the audience in the car – there will be a range of nationalities and people wanting to see all different sorts of things. My advice would be, if there is something specific you want to see, let your ranger know on the first drive, so they have time to try and work on that.
The rangers will usually communicate over radios about movements of animals and recent sightings. They will always try to get you to where the best sightings are! Unfortunately, as I have said, this is not like going to the zoo, so some drives you won't see much, others you might see that Nat Geo moment.
As you drive, there are always chances to see a huge variety of animals and you will usually find that the local guide sitting on the front of the vehicle will see animals long before your untrained eye spots them! There is always a temptation, especially on the first drive to want to stop and take loads of photos of every impala, bird or wilderbeast – let your ranger be a pretty good judge of what the priorities are and when to stop for a longer time. On slow days, you can get some amazing photos spending time with these "lower profile" animals, other days the ranger might want to drive past them because they've heard theres a sighting of something quite rare - let them be the guides.
4. Photography:
The reason you are reading this article is to get a few pointers for taking photos on safari! So lets look at the key areas where anyone starting out can make some changes.
Settings: It is a good idea to go and look at a couple of YouTube tutorials on the basic functions of the camera you are using. Know where the different setting are and how to adjust them. Most DSLR cameras like Nikon and Canon will have similar basic functions, but knowing how each affects your photographs is important. Essentially taking a photograph is all about getting the exposure of the image right.
1. Shutter Speed: One of the things to always remember when photographing moving objects like animals is that a blurred image due to movement is much harder to fix afterwards than one that is a bit underexposed. So you want to push your settings towards having a faster shutter speed! The shutter speed setting is measured in "seconds" or fractions of a second. A faster shutter speed will result in less light entering the lens and a less exposed image - but also less time that the animal is moving.
2. Aperture: The aperture controls the amount of light that enters the lens like the way your pupil does in your eye - it describes how wide open the hole that lets the light in is. In a slightly confusing way, small apertures are given higher numbers (e.g. f22) and large apertures are small numbers (f2.8). By adjusting the aperture, you will significantly alter the exposure of your image as more or less light reaches the sensor. For example, with a high aperture (f2.8), the lens is wide open and a lot of light will enter. If you reduce the aperture (moving towards f22) you will gradually close the opening of the lens that allows light in and therefore reduce the exposure of the image. A high aperture (e.g. f2.8) means you can have the lens open for less time (fast shutter speed) for effectively the same amount exposure.
3. ISO: ISO describes the sensitivity of the camera's sensor to light. This used to be fixed for the film you would put into an analogue camera, however the advancement of digital cameras has meant ISO is now easily and often automatically adjusted. Often with photography, people will shoot with the lowest ISO possible - as higher ISO's can result in lower quality and "noisy" images. However, wildlife photography is one of the times when we will look to increase ISO – increasing the ISO allows a faster shutter speed, faster shutter speed means less movement and sharper images! The other time higher ISO is used is in low-light (when you want to increase the sensors sensitivity), so low-light wildlife photography is a time to push the ISO. Fortunately these days, cameras are getting better and better at performing with higher ISO's and editing software allows us to reduce the noise in images.
Shutter speed, aperture and ISO are considered the "Exposure Triangle". By adjusting these settings you can adjust the exposure of your image! For wildlife photography (and I will mention this several times), we want to ensure our shutter speed is kept relatively fast, so we will use aperture and ISO to adjust our exposure to suit the lighting conditions. A slow shutter speed and we risk the animal moving (or small movement in the car/hand), that results in a blurred image. Below are 2 images, the one on the left is the result of slow shutter speed and a small amount of movement. The photos were both taken after sunset and without any external light. Rather than a longer shutter speed to expose the image on the left, we would have been better to increase the ISO, increase the aperture or to edit a slightly underexposed image afterwards. The image on left is completely wasted and if this was the perfect moment, we would've missed it!
4. Depth of Field: It is also really important to consider Depth of Field when taking wildlife images - this is essentially the distance over which objects in your image will appear in focus. Depth of field is controlled by 3 things - distance from you to the object(s), the focal length of your lens and the aperture. The most easily adjusted of these is aperture. By adjusting the aperture, you will increase or decrese the distance across which an object will be in focus. For something like a herd of animals, you will want a larger depth of field (low aperture/higher f value), but if you want to focus on something specific, like an animals eye then you can have a shorter depth of field (higher aperture e.g. f2.8). It can also be effective to intentionally blur out the foreground/background using depth of field to emphasise a subject in an image. In the first image below, I have used a shallow depth of field (aperture f2.8) to deliberately focus just on the lion in the foreground and blur the lion and vegetation in the background. In the second image where there are multiple animals and random movement, I have used a greater depth of field (aperture f5.6) to keep more of the image in focus so I don't miss any action of a hyena rushing. Remember that by reducing aperture to increase our depth of field, we are letting in less light! So for wildlife photography where there is movement, we don't really want to reduce the aperture too much because we will end up having blurred images!
There is a smartphone "app" that allows you to input your settings and it will tell you what your depth of field is - this becomes more important when using lenses with higher focal length and the subject is farther away. You may find your depth of field for a subject is actually extremely small and you risk being out of focus. This is where the balancing act comes in and testing your skill of wildlife photography is required to get the really crisp, in-focus image.
Modes: There are various modes on most digital cameras and as beginners we tend to just set it to "auto" mode and start taking photos. Whilst the cameras can be quite good at reading the conditions, they won't be able to predict movement, so wildlife photography is one time where "auto" mode is going to let you down. You will greatly improve your photography by gaining a basic understanding of shutter speed, aperture and ISO and then using the other modes on your camera that allow you to adjust these settings. For wildlife photography, I typically shoot in either "manual" or "aperture priority" mode.
Zoom: I used my 70-200mm lens for 80% of the wildlife photos on this safari. This is a really useful lens as it offers so much flexibility at distances that are quite good for a lot of amateur wildlife photography. There were times where I needed to be closer and used the 2x converter for "extra zoom". By using the converter, it essentially halves the aperture - so rather than shooting at f2.8 I was shooting at f5.6. The converter did allow some flexibility to zoom in much closer and it is far cheaper than a similar length lens, however there is a sacrifice in quality. By the same token, there was probably limited use for a 500mm lens because we were fortunate enough to get so close to the animals. I think in an ideal world, having 2 bodies, 1 with a 70-200mm and another with a 500mm lens (or similar variable lens) would be great. The 500mm lens would be an enormous advantage if shooting birds or you couldn’t get as close to the animals. They are also great if you want to focus on small details of an animal like eyes, nose, paw, skin etc. With these lenses you will certainly need some stablisation like the beanbag as they are large and heavy.
The image below was one situation where I did use the 2x converter and its an image I was really proud of from the safari. Its taken after sunset at a distance of around 200m. The subject, a hippo, was breaching so there was lots of movement. We need fast shutter speed but also enough exposure in low light and also the zoom to see the subject! I used my 200mm lens with the 2x converter making it 400mm. This meant my highest possible aperture was 5.6. I increased the ISO to 3200 and set the shutter speed to 1/250second. Whilst it isn't perfect, there is still enough detail to make out the whiskers on the hippo's nose!
Manual/Auto Focus: I will almost always shoot on auto-focus, you just don’t have time to be manually focusing. Usually I will use either a single or 9 focus points depending on the subject. In the Nikon camera you have the option of AF-C (autofocus continuous) and AF-S (autofocus single). In AF-C mode, the camera will continue to refocus on the subject whilst you have the shutter half pressed. This is good if the subject is moving toward you and you will need the focus to keep adjusting. In AF-S mode, the camera focuses when you press the shutter halfway and doesn't refocus until you've taken the shot - this is preferred for stationary subjects or if the subject is moving left to right across your view.
Image Stabilizer: Turn the stabilizer on your lens “ON”. The camera detects small movements and is able to correct for them. You might have this off if you are doing a lot of landscape photography on a tripod.
File Type: If you want to really have more flexability in editing your images and maintain all the data, choose to shoot in RAW. These are larger file sizes and will take up more room, but you can do a lot more, especially with night-time/lowlight images. JPEG images are compressed files and have a lot of the data missing. They are usually quite ok if you just want to take photos for social media or basic editing etc. Avoid taking in both RAW and JPEG as it will slow your camera.
Frame rate: I always have my camera set to continuous shot-high in case I need to reel off lots of shots quickly – you never know when something will spring into action.
Some cheat sheet settings:
These settings will give you a starting point from which to take photos in a some of the more common light conditions.
1. Morning/moderate light:
- Aperture priority mode
- ISO 1800-2000
- Aperture f2.8-5.6 (2.8 for individual animals, change up to 5.6 or more if more animals etc)
- This will allow a fast shutter speed. Adjust your ISO as the light changes (reduce as it becomes brighter).
2. Bright light:
- Keep in aperture mode
- ISO reduce to 1000-1600.
- Aperture f2.8 – 5.6
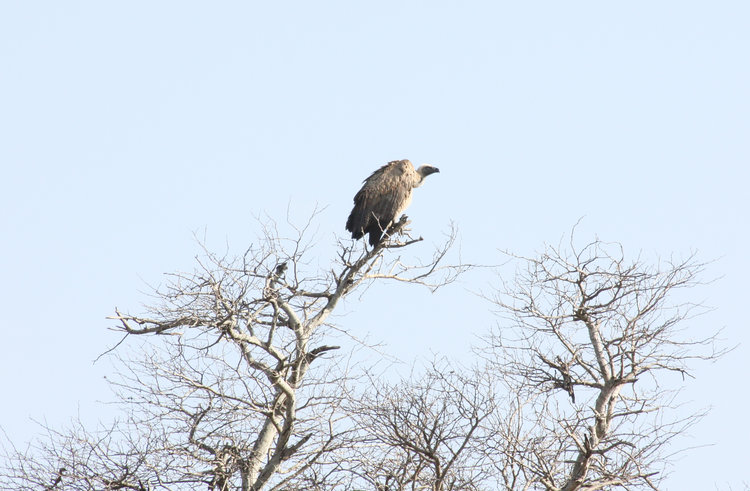
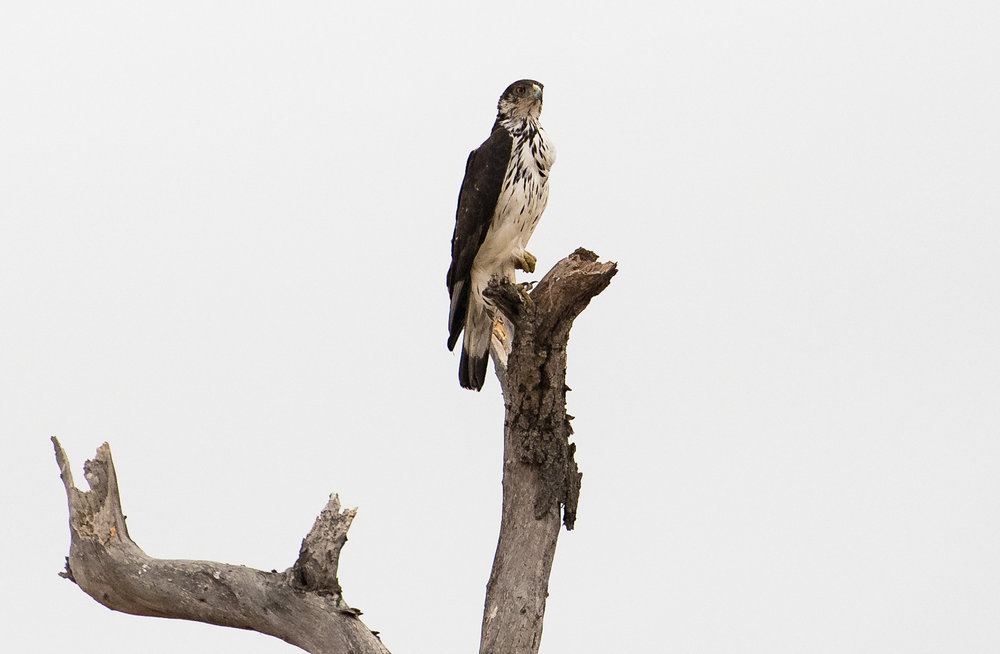
3. Trying to photograph birds in a tree with bright background:
- If in "auto" mode the subject often appears as a dark silhouette and not a lot of detail.
- Set to manual mode
- ISO 1250
- Aperture 5.6
- Fast shutter speed in case the bird takes off
- Light adjustment +2 to +3
- This will overexpose the subject to bring out the detail. The background will typically appear white, but your bird and branch will have great detail. Just remember to change the light adjustment back to zero before you start taking your next series of pics!
Low-light/night time with a spotlight:
- Now you are going to need to reduce the shutter speed to allow enough light in.
- Change to manual mode
- ISO 3200 (newer cameras can push the ISO higher without getting much unwanted noise)
- Aperture f4.0
- Shutter speed, start at around 1/160 of a second and can increase to 1/250s if you need. Use the shutter speed to adjust the exposure. Need to be sure to keep still when taking these lowlight images or use a beanbag etc to reduce slight vibrations.
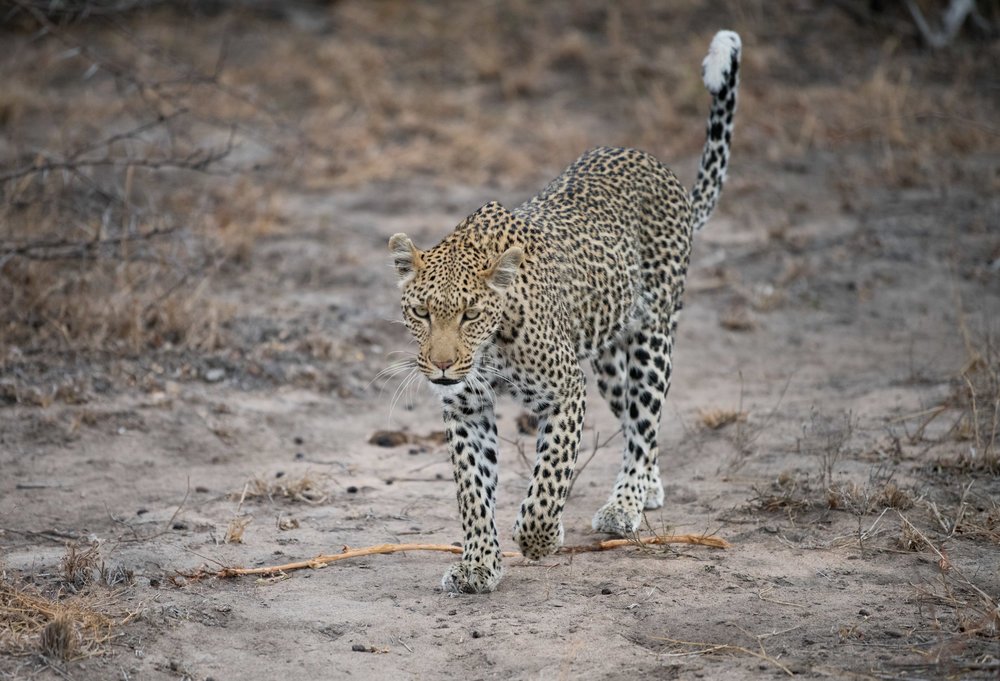
Composition: You will see and even take a lot of images that, when you look on the computer afterwards, need to get discarded because of poor composition.
A really common mistake is chopping off the top of the tail of something like a leopard – it just ruins the photo and there is nothing you can do in editing to fix it. A better idea in the beginning, is to take a wider composition and especially if your camera has a high megapixel count, crop down afterwards.
Try to think about how the image will look as a whole, rather than just focusing on what the animal is doing:
- Are there nice, iconic trees in the background.
- If there are multiple animals in the shot, which do I want in focus?
- Which direction is the animal looking or moving: its always nicer to have a bit more space in the photo in the direction an animal is looking or moving.
- What is in the background? Powerlines, roads or anything man-made that will detract from the photo?
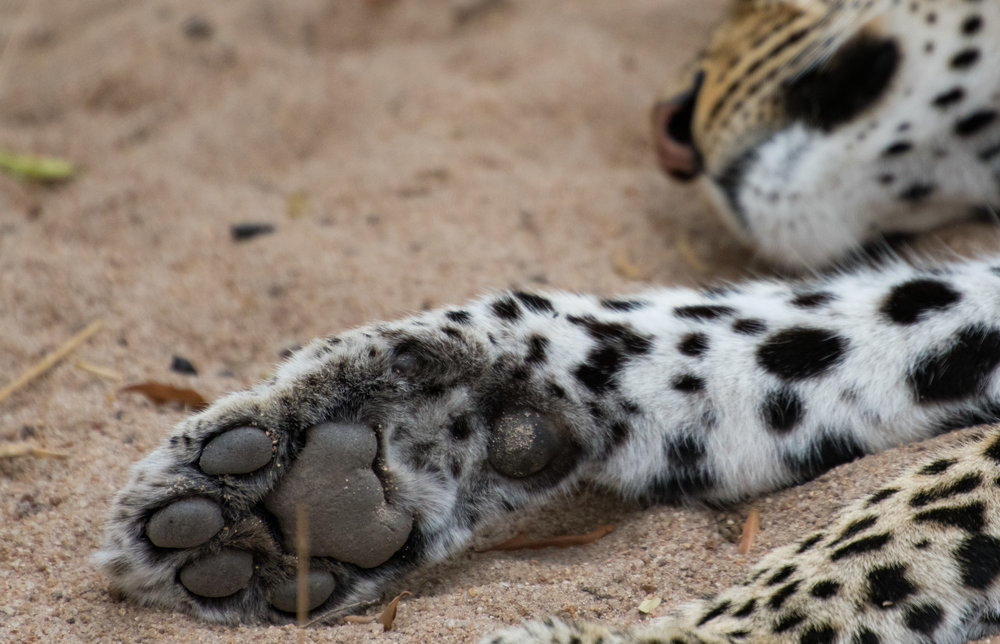
Subject: The star of your image will almost always be the animal. So we need to pay special attention to how the animal is going to look. Often, it’s the action photos that create the most interest – lions roaring, leopard snarling, birds taking off – so its key to be ready to take multiple images in a short space of time to capture that moment. Other times, even when the animal is still, considering how it will look afterwards is really important – you might want to focus solely on the paw of a sleeping leopard. If a lion is feeding, getting those claws can make for a great picture. So play around with wider angles and then look to zoom in and focus on some really specific things. Think about textures and what might work really well in black and white – the wrinkles in a elephants skin at a close distance or the scars on a male lion's face.
If an animal is walking towards, away or across the view, take a burst of photos. You will find on the laptop afterwards, that 90% are throwaways because eyes were closed or legs were in awkward positions – hopefully 1 of them will be that perfect look.

Something I always try to do is learn as much about the animal and the area I can from the ranger (or google.....). Everyone rushes to tick animals off the checklist and get a snap, but you will end up with lots of very standard images. Spend some time just parked and watching an animal or a group and learn a bit about their behaviour, mannerisms and anatomy. You will begin to find that the best shots come from capturing the true re-creation of what that animal does - not just its reaction when you first arrive in your safari vehicle. The images below are from simply being patient and spending time at a site!
5. Handling your Images:
Having a system to download and then organize your files is critical, not just for your wildlife photography but with all your photos. In the end, it needs to be a system that works for you! This is my system and why I do it, but find a method that works and keep things organsied.
- Following each drive (or photo session) I download my RAW files onto an external hard-drive. The folder is labeled with the location and date (eg Kambaku19Sept2017).
- Those images are then opened in my editing/viewing program, Adobe Lightroom. Here I scan through each image and flag the ones I will keep for any editing – only these images are imported. I do still keep 1 copy of all the images in the original folder on the hard-drive, although admittedly this is more personal OCD than a requirement.
- Once edited, the Lightroom folder on the hard-drive is backed up to a second external hard-drive (I don’t back up all the images, only the ones I decided to keep). In reality, I probably do this weekly.
- A key is to always ensure images go into relevant folders which are easy to search for and easy to distinguish. Adobe Lightroom makes the process of cataloguing your images pretty straight forward. I end up with 1 4TB hard-drive that has all my working images and a 2nd hard-drive that is just for back ups.
- Something to keep in mind about Lightroom, when you edit the RAW files, all the information is retained, so at any time you can "un-do" all the changes you have made and your original file is unaffected!
6. Editing your images:
The software these days allows us to apply “tweaks” to improve the look of an image and I have no issue doing this - so long as we maintain the original look and feel of the photograph. I am not a big fan of using Photoshop manipulations to dramatically alter wildlife images away from what was seen with the naked eye.
I exclusively use Adobe Lightroom as my editing software of preference. It’s fantastic for sorting, editing and exporting images. I am by no means an expert and the more experience you get playing with images, the better you will become. My aim is to recreate what I saw live. For this reason I like to try and edit images that day or the next day, whilst its fresh in the mind.
Firstly, how to select the images to keep! In a single drive you might end up with 1000 images – you don’t have time to edit this many and nobody wants to look at them all. So, start by culling out the obvious ones – blurred, eyes closed, animals not looking, grossly under/over-exposed, poor composition, etc. From that, you will likely end up with many photos that are quite similar, but have slight variations – so from here you will be deciding between which to keep. Some of this is personal preference, otherwise consider direction the animal is looking, what is in the background, how focused the subject is etc. Be sure to zoom in on the areas that you wanted to be in focus and check that they are sharp on the images you retain.
To select the images to retain in Lightroom:
1. Click "import" and select from the list on the left, the drive that contains your files.
2. Uncheck all the images.
3. Manually flick through each image and select the ones you wish to keep by ticking to select icon or using the "p" key (pick). You can get more creative by using different attributes and flags to put photos into groups or ratings.
4. Select import and ensure Lightroom saves them in a designated folder on your hard-drive
Try to reduce the number down to 10% of your images of the total images taken on that drive. In some cases you might wish to keep and edit a series of images which depict action.
Lightroom has a huge number of functions and the more you use and become familiar with the software, the more accustomed you will become, especially with some of the subtle changes and the corrections you can make.
I will discuss the main things I look at in most images:
- White Balance: White balance is how the camera understands the "temperature" of the lighting when you are taking a photo. It is something that cameras still find challenging. I tend to shoot in Auto White Balance as a matter of convenience and trust my camera to get pretty close. This is another reason to shoot in RAW, as it is easy to correct white balance in editing. If you shoot in JPEG this can't be done as easily. Usually, the RAW files will require a mild increase in white balance to remove unnatural blues and greys. You really want to be re-creating how the scene looked naturally!
- Exposure: The best way to manage exposure is when you are taking the image. However, as I will always sacrifice sharpness for exposure in wildlife photography, there are times when my images are a little bit underexposed and need to have this increased. Modern DSLR cameras shooting in RAW also retain a lot of the detail in shadows that can be “recovered” in processing. This can be done also by adjusting the "shadow".
At any time, you can compare your edits to the original image by clicking on the Y|Y button at the bottom.
- Contrast: I tend to increase the contrast setting of images in order to make the subject “pop” a little bit off the screen/page.
- Vibrance/Saturation: These control the colour intensity in your image. I rarely use the saturation slider as it evenly affects all the pixels in your image, even the ones that are already intense. Vibrance tends to increase less dramatically and increase the colour more in the less intense pixels. This tool can assist in subtly bringing out some of the natural colours that may have been diluted out of the image. Avoid completely saturating your image - it will look very unnatural.
- Sharpening: As a general rule, I will adjust the sharpening to allow the software to really make the elements in focus (hopefully the animal) as crisp as possible. Usually between 50-90. I will also use the masking tool to concentrate this effect on the areas in focus and contrast it with those I have allowed to blur.
- Noise Reduction: Especially in low-light conditions, when we are increasing the ISO, images can take on a "grainy" appearance - this is called noise. Cameras are getting better and better at operating at higher ISO values, however it will still be a factor in low light conditions. This grainy appearance can be somewhat overcome in lightroom using noise reduction.
- Cropping: An advantage of high megapixel cameras in that you can be generous with your composition, especially when you are getting started and then crop in later. Rememenver that the more you crop, the lower the resolution of resultant image over a given size. You can crop out unnecessary background elements, help to re-orientate your composition or zoom in on a particular aspect of the image.
The image above is of the mating dance of a Red Crested Korhan. The original is taken with a 200mm lens, f4.5 (to give some depth so as not to miss the birds during their movement), shutter speed of 1/1600 (as the male was dancing around quite quickly) and ISO of 1000. Despite being a distance away from the birds and only using a 200mm lens, the final image is quite nice due to the fact we could crop in quite close. Much of the detail is maintained due to the resolution of the original image.
Below is the series of images, showing the pre-mating dance, successful mating and a little dance to finish! Quite a rare sighting and really fortunate to get on camera.
- Dehaze: Recent Lightroom updates will have a "dehaze" option which allows you to use the software to reduce (or increase) atmospheric haze (including fog, glare). This can be quite useful to create very clear images.
There are a number of other editing functions you can use for various photos - spot removals, shadow slider, individual colour adjustments, etc. However the above would be adequate for the vast majority. Remember, the idea is to re-create what you saw, not create an imaginary setting.
Once you have edited your photos, you can export them for viewing. I have 2 presets for export – a social media/low resolution file size and a higher resolution file size. For normal viewing, sharing etc, the smaller files sizes (around 1-2Mb) are adequate. To do this, change the “Image Sizing” setting to “Resize to fit”. Select the long edge to be 2,048 pixels and resolution to 300 pixels per square inch. These files will easily upload to social media like Facebook or Instagram. For the higher resolution images, unselect the “resize Image”, you may still wish to limit the file size to a maximum of 10Mb for ease of handling. I export as JPEG, with quality set to 100. Be sure to select the location where you want the images saved - ideally a folder on your external hard-drive to avoid taking up space on your computer.
7. Sharing your images:
One of the more satisfying things to do is to share your images with family, friends and the community. These days, social media allows you to share your images with a much wider audience. There are the platforms like Instagram, Facebook and Pinterest. Instagram also lets you “tag” accounts such as National Geographic that may “repost” your image and story. Below are some social media accounts that are worth following and tagging in your wildlife images.
Instagram:
National Geographic: @natgeo @natgeowild@natgeoyourshot
Africa: @africa
African Exploring: @africanexploring
Big Cats Diary: @bigcatsdiary
The African Safari: @theafricansafari
Kruger National Park: @krugerthroughmyeyes
Villiers Steyn: @villierssteyn
At Close Quarters: @at_close_quarters
Kambaku Lodges: @kambakulodges
Facebook:
South African Wildlife Photographers
At Close Quarters
Additionally there are platforms such as 500px, Shutterstock and Adobe Stock where you can share and even be paid for your images if they are used.
Of course, the best place for your favourite captures is printed and hung on the wall! For these images, the resolution of the final product will be far more significant than when you are posting on social media. When the resolution or the file size is low, the image with lose quality when it is blown up.
Select the images for print carefully - consider where they will go and the framing - some spaces lend themselves to black & white, others to action shots and others to unique close ups.
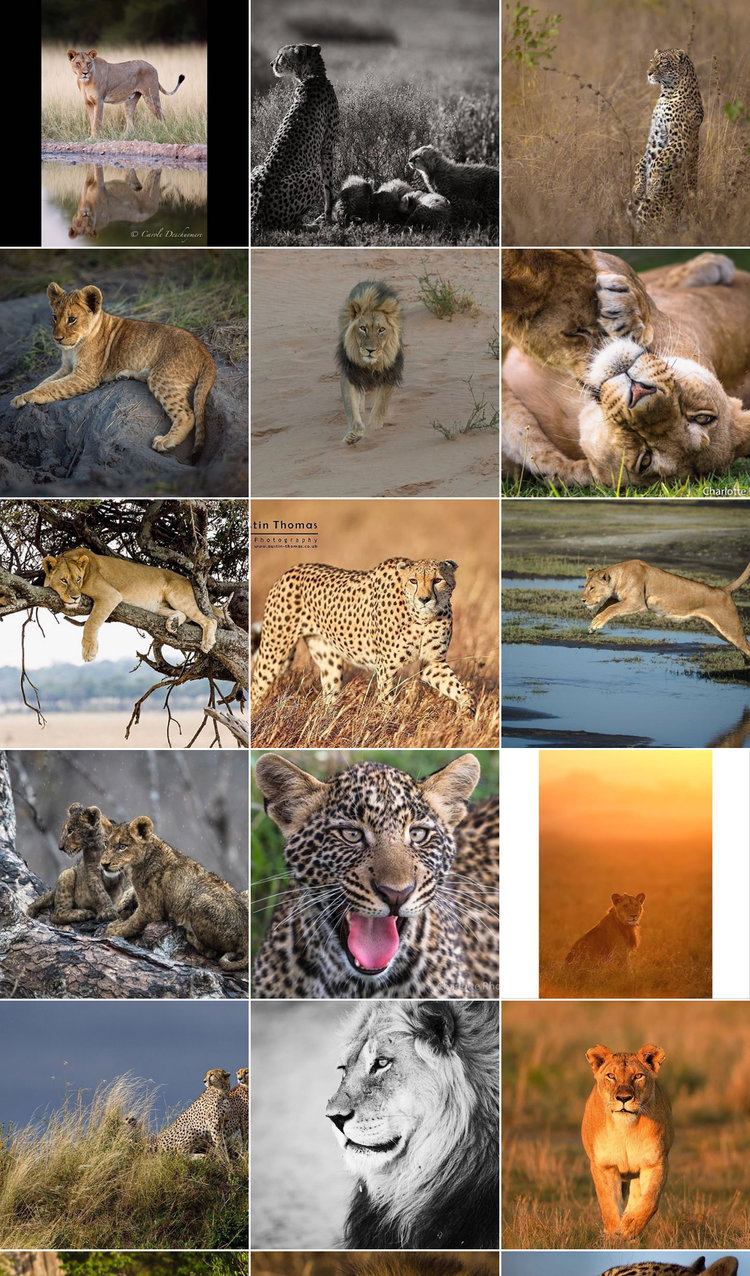
I hope you enjoy this gallery of my favourite images from my stay at Kambaku Safari Lodge:
Acknowledgments:
Villiers Steyn of At Close Quarters was a significant support in developing my wildlife photography skills. If you have the chance to do a dedicated wildlife photography safari, it will provide an opportunities to improve your skills and understanding far better than you can by yourself. Even for beginners, you will learn the fundamentals that will make taking wildlife photos more enjoyable. Villiers and At Close Quarters run private and group photographic safaris, visit their website or contact them directly to arrange an experience that suits you. For much more detailed information about photographic safaris, photography techniques and settings, visit their website! Its also a great place to get some inspiration for booking your next safari. At Close Quarters.
The team at Kambaku Safari Lodge were fantastic in providing an opportunity to create the images for this review. As is most often the case, I paid the standard rate to stay at the lodge, so can provide an honest and unbiased opinion. Kambaku is ideal for visitors looking to visit a park with incredible populations of wildlife. The facilities are impeccable and I loved that the lodge aims to operate with a zero carbon footprint! Many lodges charge visitors some astonishing rates, however Kambaku has kept their fees at a level where visitors can enjoy a luxury safari experience, without spending the entire trip budget!
Nikon Middle East have been a wonderful support in ensuring I had the chance to take the recently released D850 on this safari. Through their Nikon Schools and Nikon Premium Member programs, Nikon Middle East also provides great opportunities for people to develop their photographic skills, including in wildlife photography.
Footnote: We had some incredible rhinoceros sightings at Kambaku and took some beautiful photographs, however I have chosen not to publish the images so as not to give any opportunity for these animals to be identified. It is personal opinion whether people choose to publish on social media - on one hand it can raise awareness to the desperate situation these animals face, on the other it does provide opportunities for poachers to identify areas where rhinos are. Its definitely worth taking time while you're in South Africa, learning not only about rhinos, but also the huge number of species facing extinction due to poaching and other human interventions.
Related Articles
articles that we think you will love


Join the Conversation
Be part of the community Discussion


Copyright © 2024 The Travel Hub. All rights reserved.